
Navigation link
Configure navigation link
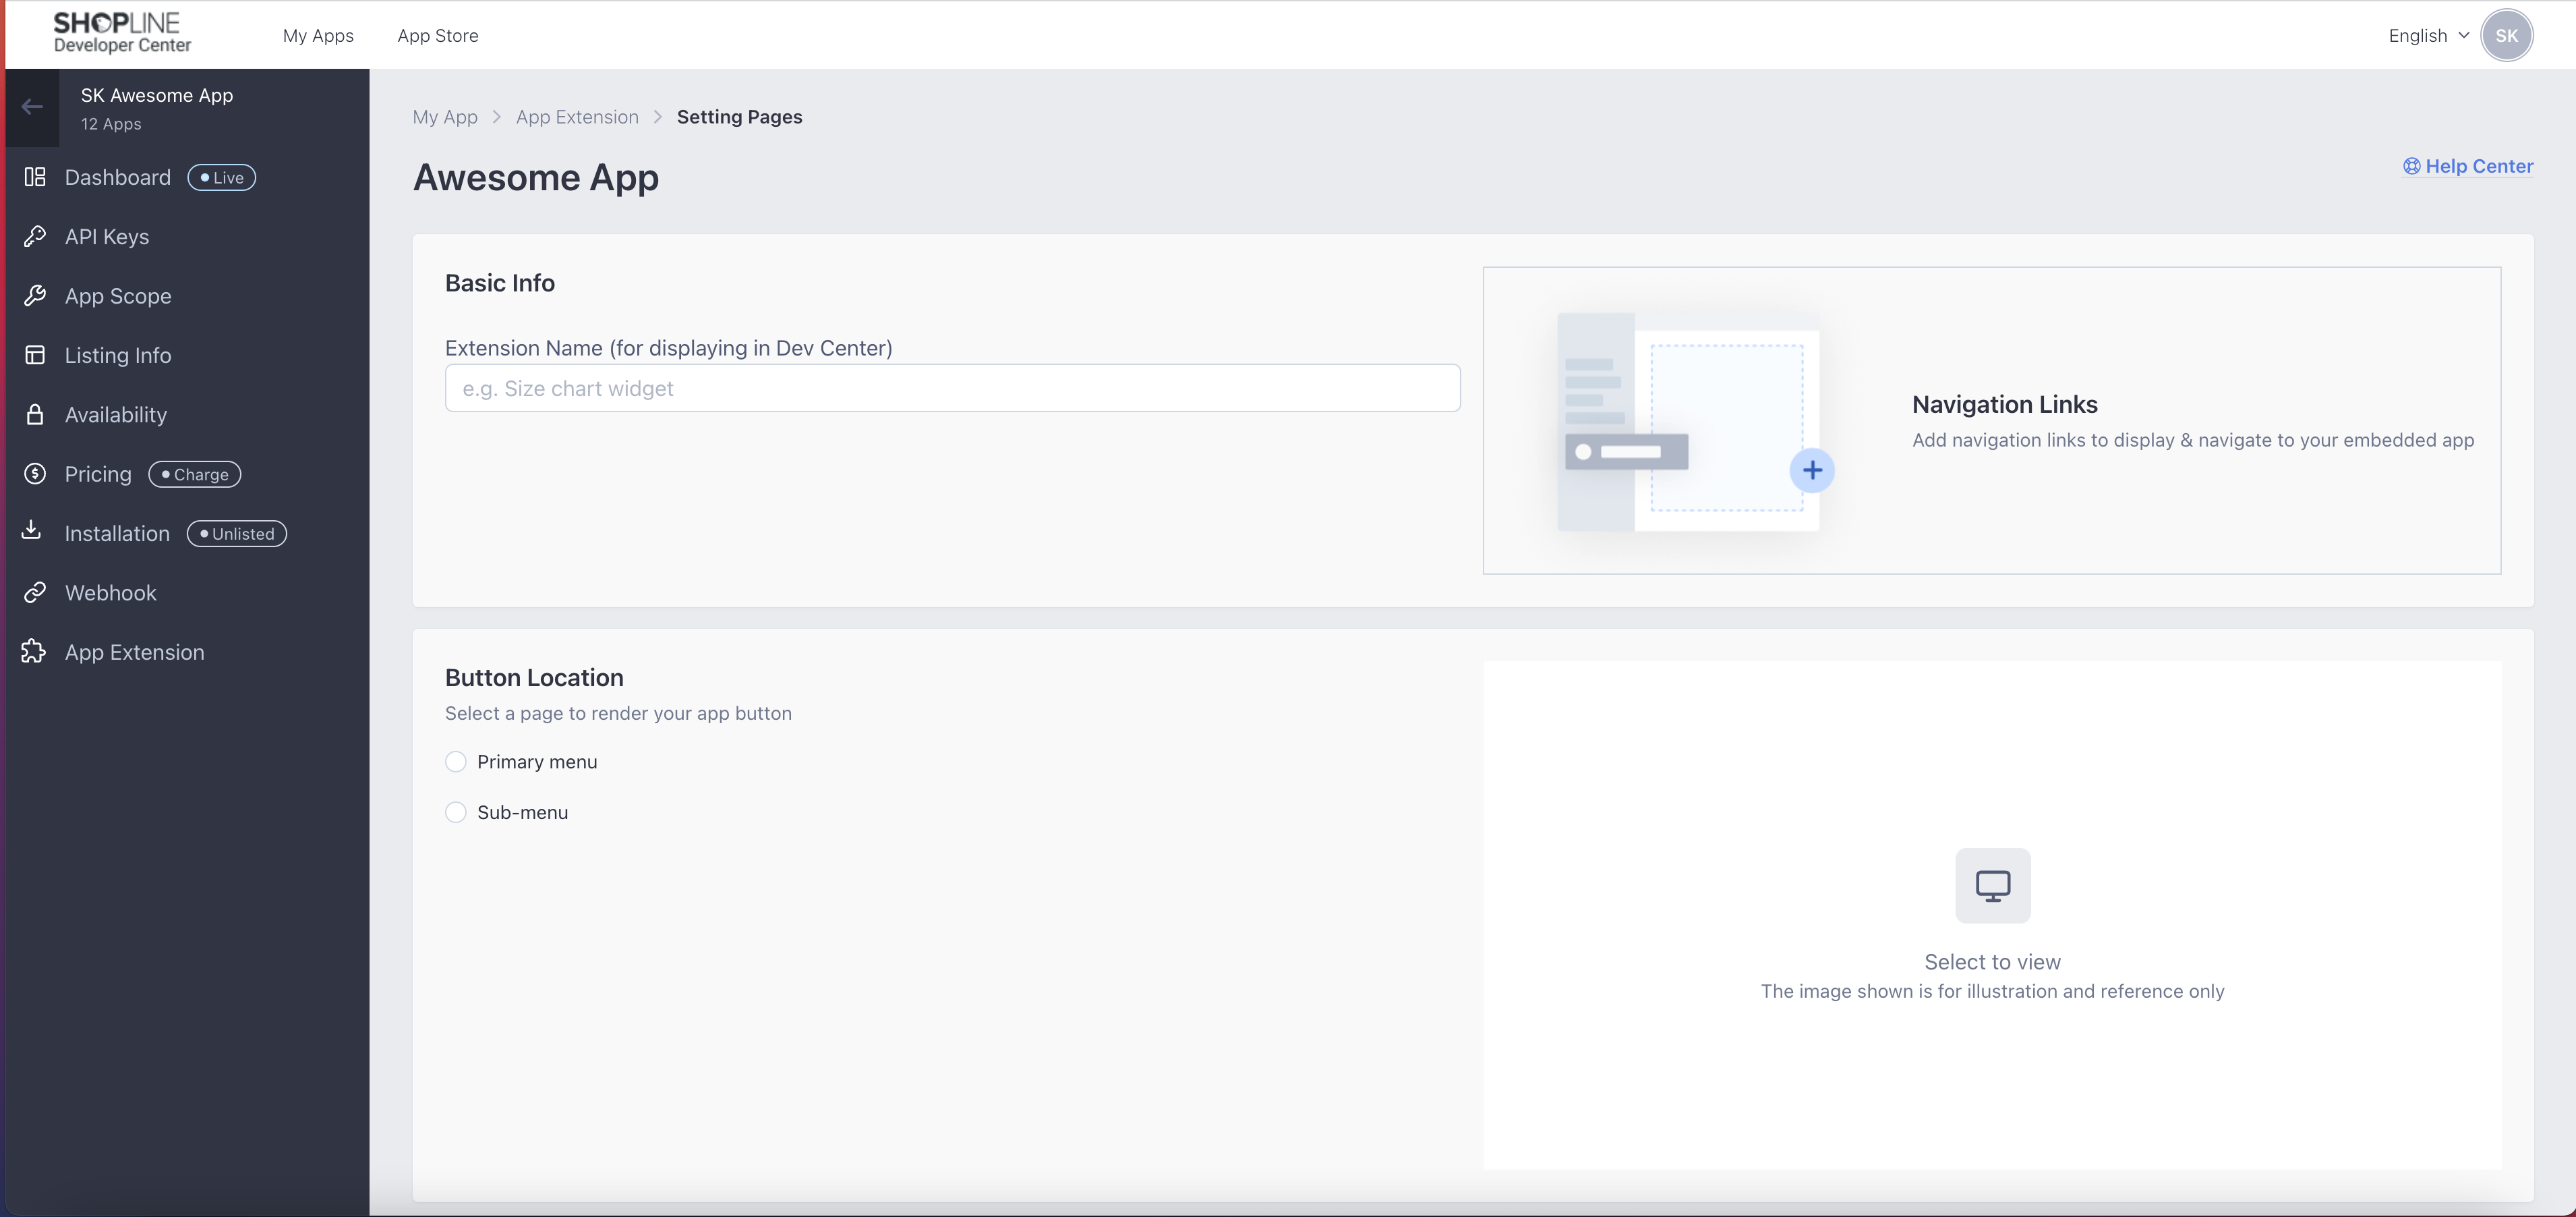
1. Create the app and configure the app settings
2. Click Add Code in the App Extension Section & select Navigation link

3. Fill in the required details and configure the settings such as extension name, button location, button actions setting, button text and favicon.
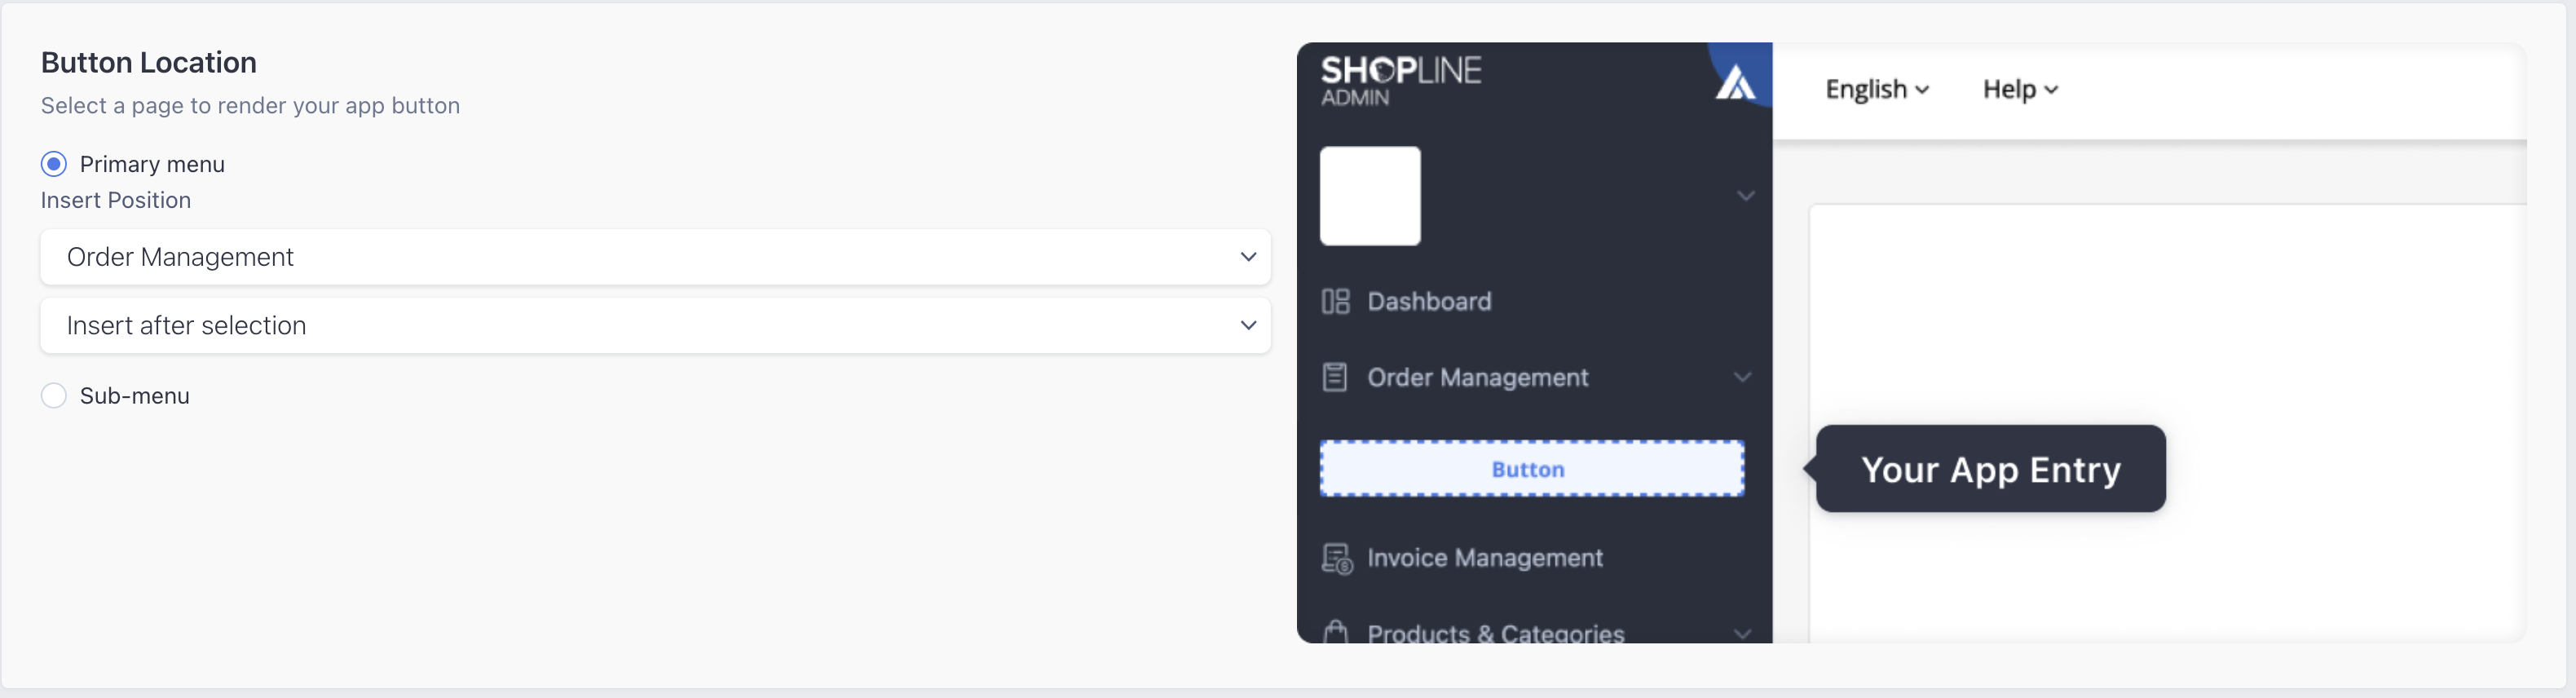
a. Button Location
Select the insert position of your App button. First, you can choose primary or secondary level then select the exact insert position.
b. Pre-install Exposure
In the Navigation link settings, toggle on Pre-install Exposure.
- Toggle OFF: keeps the original behavior. The link is visible only after install.
- Toggle ON: the link can be rendered before install (subject to eligibility related setting too. i.e. whitelist + availability + listing status).
You can rely on the embedded app and Admin SDK to implement the embedded app settings and redirection logic. More details please refer to embedded app for detailed explainaition and Github for app bridge.
When pre-install exposure is ON, the app is eligible and the technical implementation is complete, the app can then benefit from pre-install exposure and higher-conversion entry pages.
- Not installed: click opens developers configuired page (i.e. App Details Page / Self developed campaign page)
- Installed: click follows the existing installed-state behavior

c. Button Actions Settings
You can configure and choose the mode of page opening & setup landing page here.

Click the button to select app proxy page path. Click add more if you want to set up a new one, click edit if you want to modify existing app proxy page path.
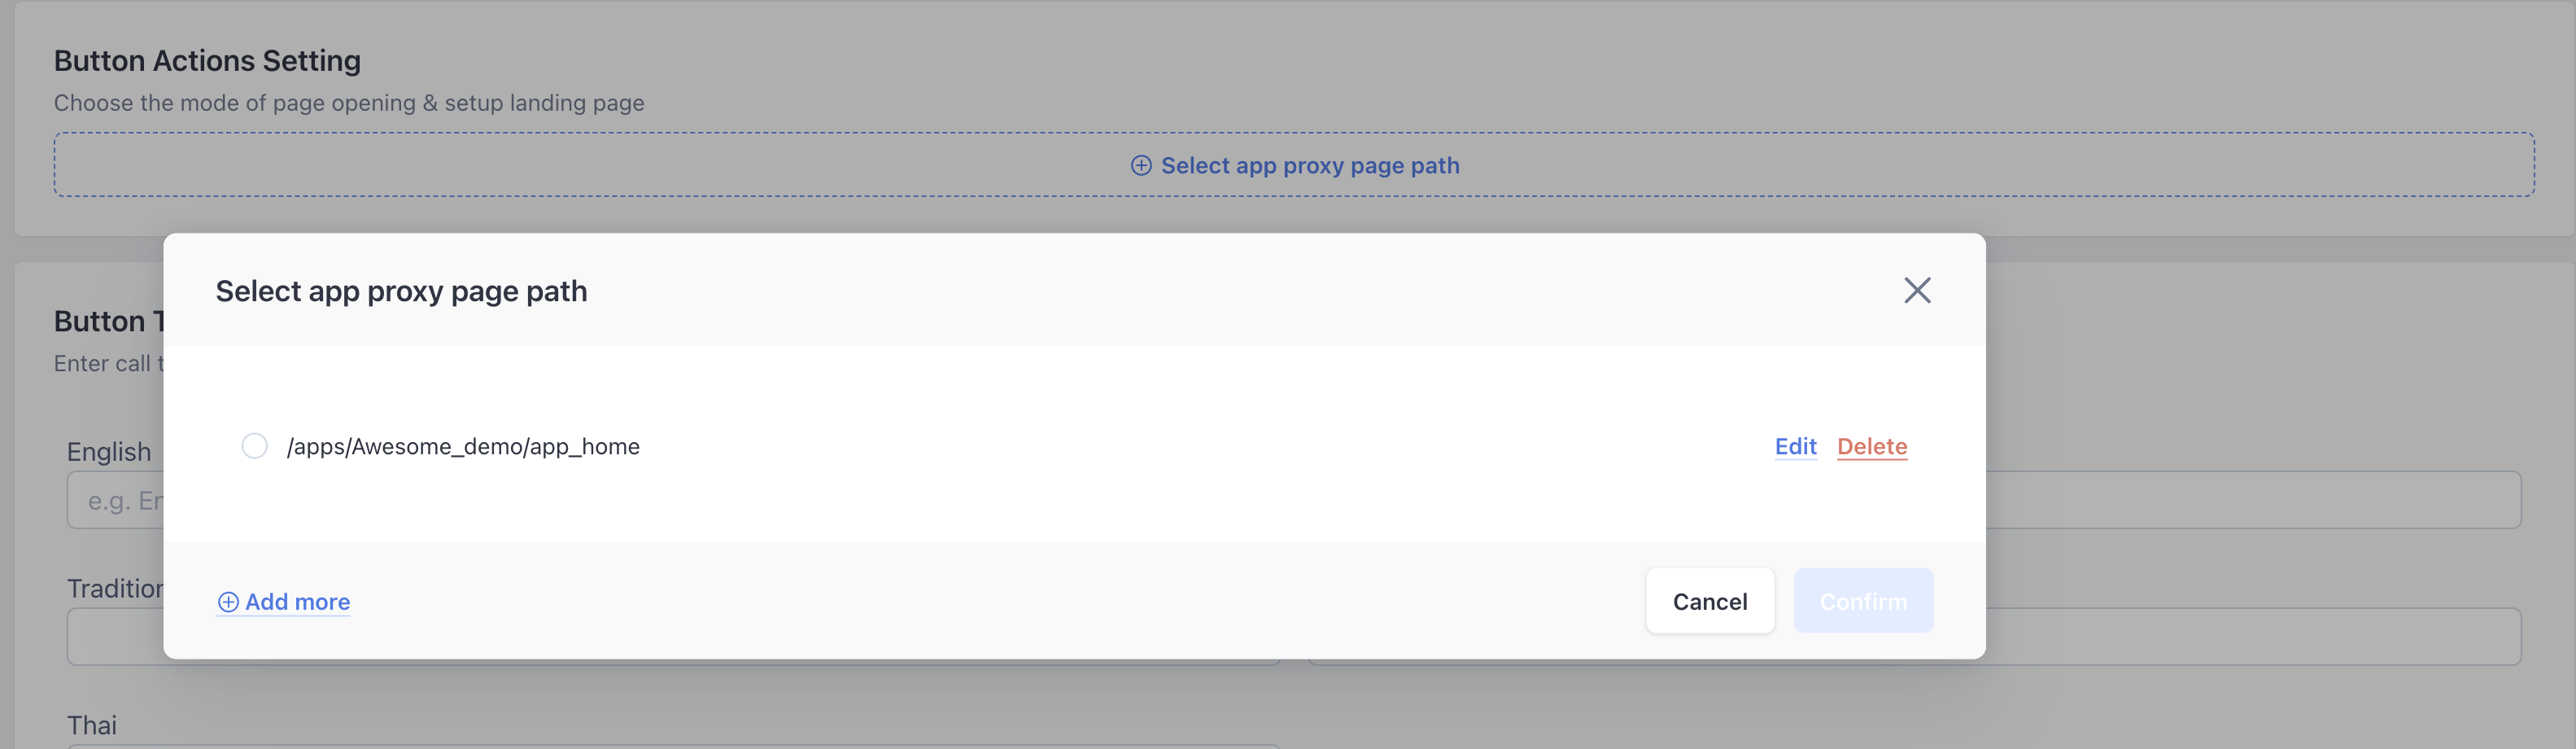
Confirm your setting once you are done.

App proxy page path & Iframe URLApp proxy page path is the page path that merchants use to access the Iframe embedded App proxy page. To do this, you need to configure the mapping here so that our system will redirect merchants to the app proxy page with the specific path.
d. Button text
Button that powered by Admin app extension support multi language. Currently we support English, Simplified Chinese, Traditional Chinese, Vietnamese, Thai.

e. Upload Favicon
Your favicon will be shown next to the button text, recommended Image Size: 32 x 32 pixel.
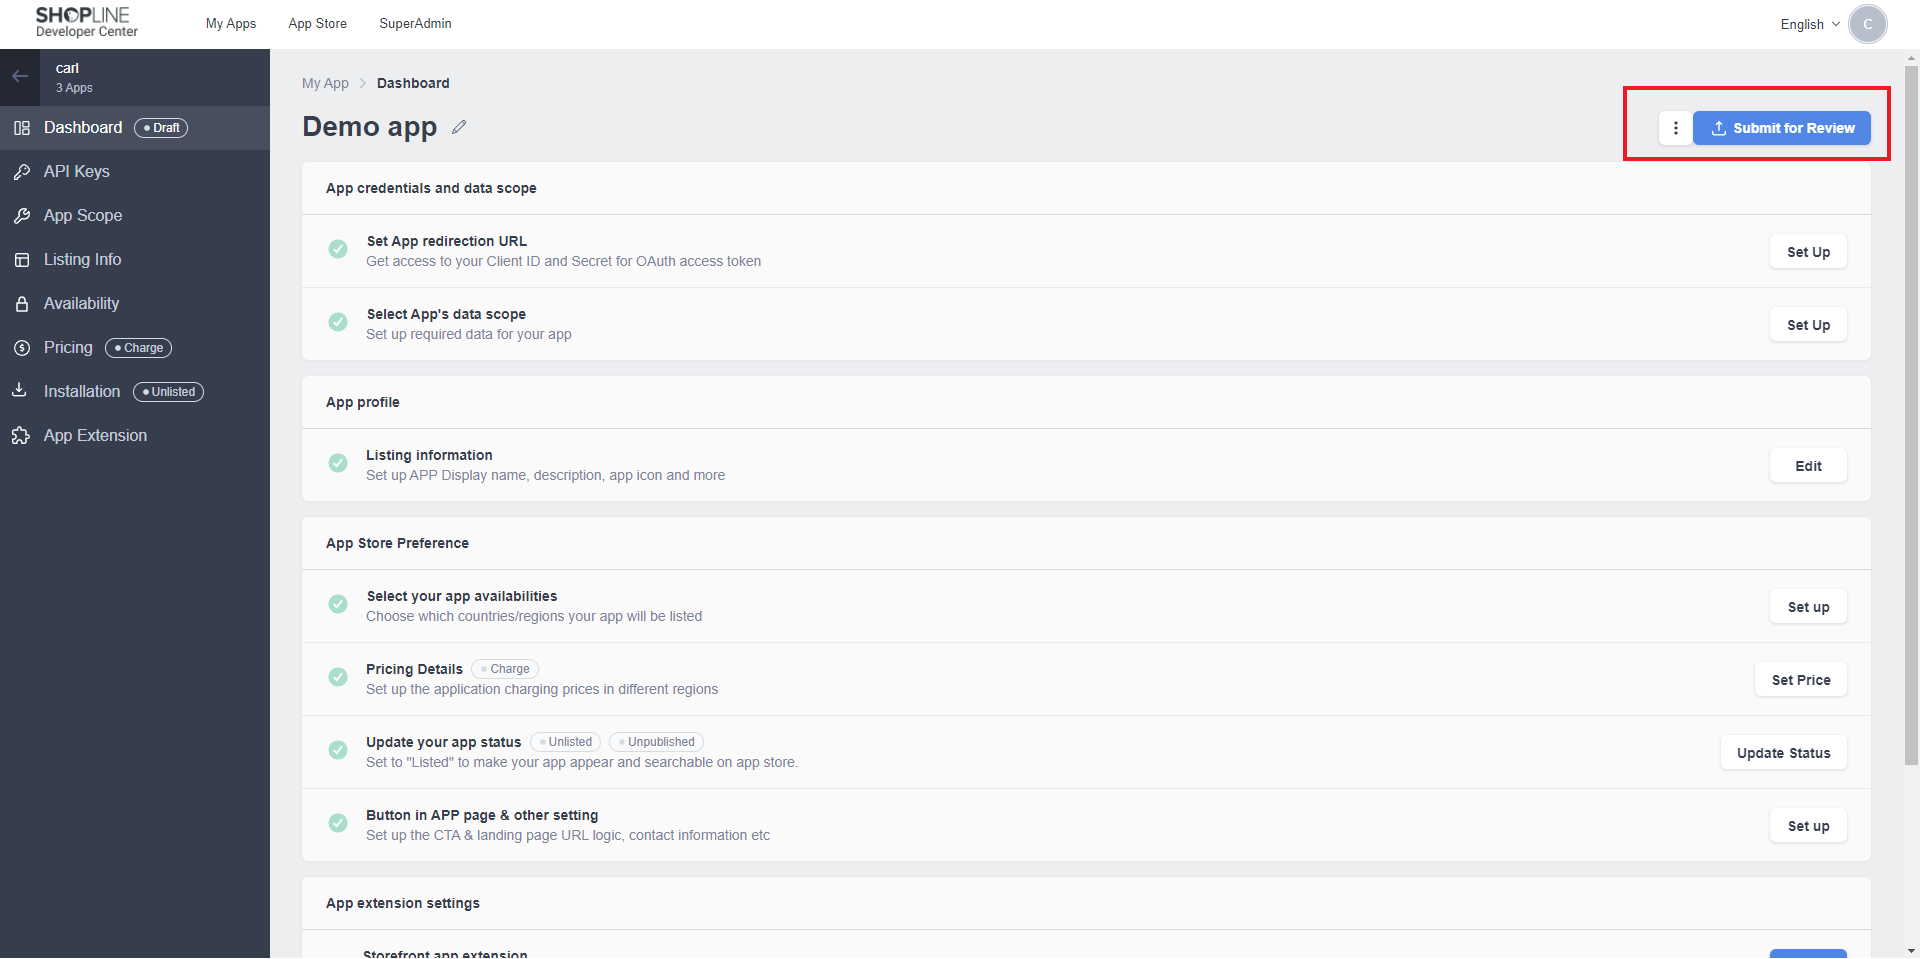
4. Submit the app and wait for approval
The admin link will be active after the merchant installs the app. For app installation, please refer to https://dash.readme.com/project/shopline-developers/v1.0/docs/install-an-app-1
Navigation link (Features that need special approval)Navigation Link is not yet open to the public.
Access is controlled by whitelist. If your app needs this capability, please contact the SHOPLINE Partnership team before submitting app updates to confirm whitelist requirements and opportunities.
Roundup : Pre-Install Navigation & ExposureThis feature allows a navigation entry to appear before app installation for improved app discovery, with behavior split by install state.
Key Steps
- In your app extension settings, create a Navigation Link entry.
- Enable the option to display the link in pre-install mode.
- Keep existing menu/action text/icon settings as mentioned.
- Ensure your app is eligible to be shown according to open platform - developer center config (feature access + availability settings).
- Set up the pre-install navigation via the aids of embedded app and sdk
- Submit for platform approval to verify
- If the app is not installed, the navigation link opens the configured page via the aids of app bridge.
- If the app is installed, the navigation link opens the app’s embedded admin page base on development center setting
Updated 3 months ago